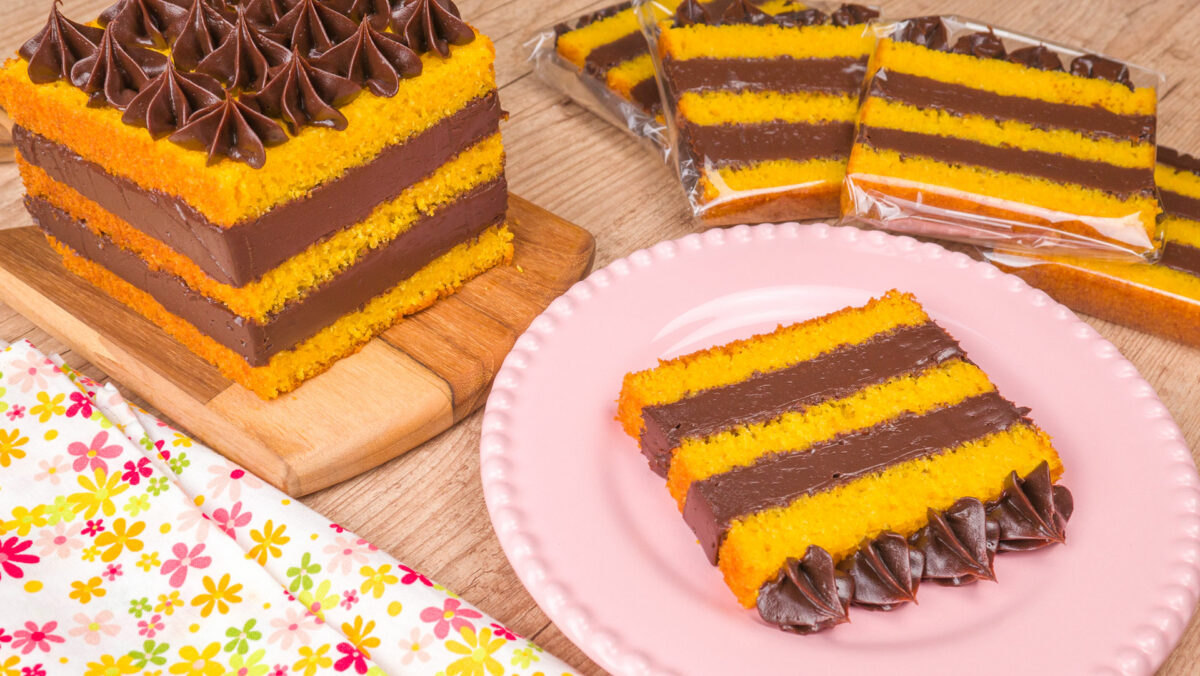
how to make carrot cake with truffled brigadeiro slice
Here's the recipe for a delightful Carrot Cake with Truffled Brigadeiro slice. Let's get started!
PORÇÕES10 slices
CALORIAS630 Kcal
PREP.1h 10m
COZ.3h 40m
TOTAL4h 50m
COZINHABrazilian
INGREDIENTES
Filling
13.7 oz Condensed Milk(390g)
4 tbsp Unsweetened Cocoa Powder1.4 oz (40g)
14.1 oz Heavy Cream(400g)
9.9 oz Chopped Milk Chocolate(280g)
Cake
7 oz Chopped Carrots(200g)
3 units Eggs
1 cup Sugar7.9 oz (180g)
1/2 cup Oil4 fl oz (120 mL)
1.5 cups All-Purpose Flour6.35 oz (180g)
2 tsp Baking Powder0.35 oz (10g)
INSTRUÇÕES
Filling
1
In a saucepan off the heat, combine condensed milk and sifted cocoa powder. Mix well until be homogeneous.
2
Add the heavy cream and mix well. Place on medium-low heat, stirring constantly.
3
Once it starts to boil, cook for about 8 minutes.
4
<p>Remove from heat and add the chopped milk chocolate. Stir until the chocolate melts. This filling yields 32.8 oz (930g).</p>
5
<p>Divide this filling into 2 containers with 14.1 oz (400g) of filling each, and one container with the remaining 4.6 oz (130g) of filling.</p>
6
<p>Cover with plastic wrap or a food storage bag in direct contact with the filling, and let it cool at room temperature.</p>
Cake
1
<p>In a food processor or blender, combine the chopped carrots, eggs, sugar, and oil. Blend well.</p>
2
Add the all-purpose flour and baking powder, and mix with a spatula.
3
Transfer to a rectangular pan measuring 8.7 in x 3.9 in x 3.5 in high (22 cm x 10 cm x 9 cm). Line the bottom with parchment paper; no need to grease or flour it.
4
<p>Pour the batter and bake in a preheated oven at about 400°F (200°C) for approximately 40 minutes or until a toothpick comes out clean.</p>
Assembly
1
Take the pan in which the cake was baked and line it with a food-grade bag.
2
Place a layer of cake at the bottom; it should be as smooth as possible.
3
<p>Add the 14.1 oz (400g) of filling.</p>
4
Add another slice of cake.
5
<p>Add the other 14.1 oz (400g) of filling.</p>
6
Add the final layer of cake.
7
Cover and refrigerate for at least 2 hours.
8
Unmold the cake by pulling the plastic bag.
9
Turn it sideways to slice it without making a mess.
Packaging
1
<p>I used cellophane paper (it comes in a size of 33.5 in x 39.4 in (85 cm x 100 cm); I cut it to a size of 11 in x 9.8 in (28 cm x 25 cm).</p>
2
Take a spatula and fold the cellophane paper; this will make it much easier.
3
Cut the cake into slices about 0.8 inch (2 cm) thick and place it on the cellophane paper.
4
<p>Put the 4.6 oz (130g) of filling in a food-grade bag with a 1M tip and decorate the top.</p>
5
It's very important to clean the knife after each cut.
6
Fold the cellophane paper over the cake and use your fingers to gently make it stick.
7
Seal it with tape; close the edges like a present and also use adhesive tape.
Observações e Fotos
Valid to: 5 days stored in the refrigerator and 90 days stored in the freezer.
For slice cake packaging, there is also a slightly plastic-coated cardboard sheet available to place under this type of cake, which provides even more protection. You can find these in confectionery stores or online.