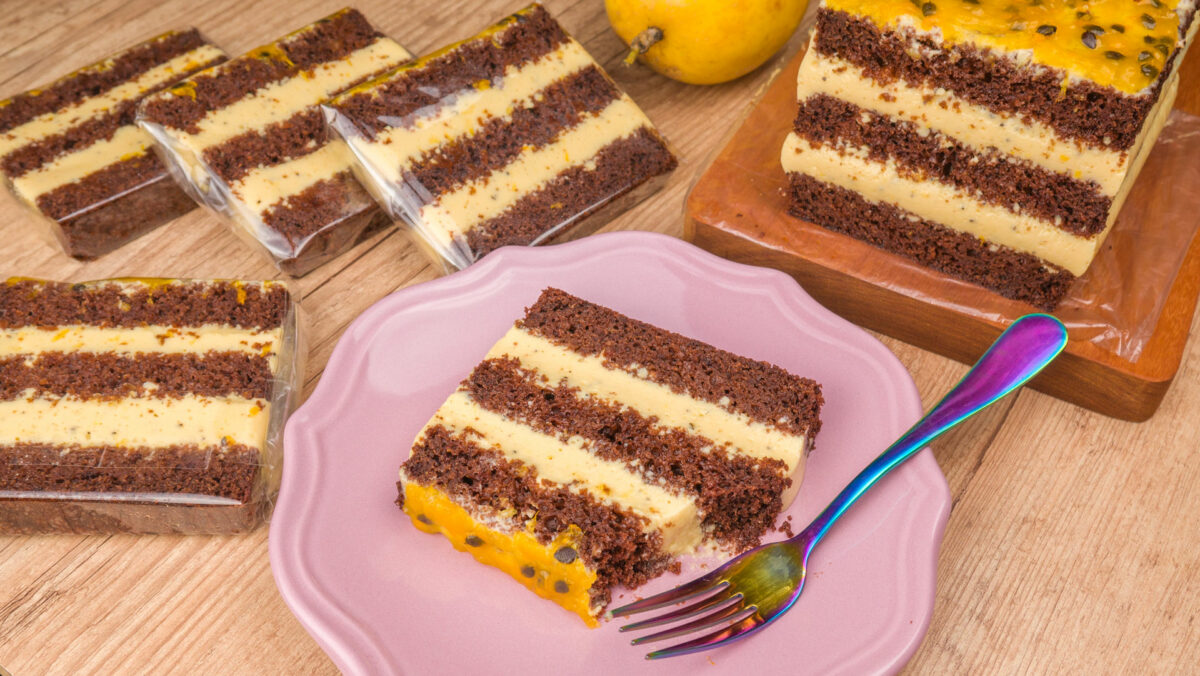
how to make passion fruit cake slice
As you asked me for more Cake Slice recipes, today I brought a delicious chocolate and passion fruit flavor. Let's learn how to make it!
PORÇÕES9 slices
CALORIAS441 Kcal
PREP.3h 10m
COZ. 50m
TOTAL4h
COZINHABrazilian
INGREDIENTES
Dough
3 units Egg
1 cup of Sugar6.34 oz (180 g)
6 tbsp of Cocoa powder2.1 oz (60 g)
1/4 cup of Oil2 fl oz (60 mL)
1/2 cup of Waterwarm 4 fl oz (120 mL)
1 an 1/2 cups of Wheat flour6.3 oz (180 g)
2 tsp of Baking powder0.4 oz (10 g)
Syrup
1/2 cup of Water4 fl oz (120 mL)
2 tbsp of Sugar1.1 oz (30 g)
Passion fruit mousse
0.2 oz of Unflavored gelatin(6 g)
3 tbsp of Water1.5 fl oz (45 mL)
1 cup of Passion fruit juiceconcentrated 8.1 fl oz (240 mL)
1 unit of Passion fruit pulp
13.8 oz of Condensed milk(390 g)
7 oz of Heavy Cream(200 g)
Topping
1 unit of Passion fruit pulp
4 tbsp of Concentrated passion fruit juice2 fl oz (60 mL)
1 tbsp of Sugar(1 tablespoon) 0.53 oz (15 g)
2 tsp of Cornstarch0.21 oz (6 g)
INSTRUÇÕES
Dough
1
In a bowl, put the eggs, sugar, cocoa powder, and oil and mix well
2
Then add the warm water and mix again
3
Start adding the wheat flour little by little
4
When it becomes homogeneous, add the baking powder
5
<p>Pour into a rectangular mold of 8.66in x 3.94in x 3.54in ( 22cmx10cmx9cm) in height, line the bottom with parchment paper and there is no need to grease or flour</p>
6
<p>Take to the oven preheated to 392°F (200ºC) for approximately 45 minutes or until you do the toothpick test and it comes out clean</p>
Syrup
1
Take the water and sugar to the fire
2
When it boils, leave it for 2 minutes
3
Remove from heat and when it cools, put it in a squeeze bottle
Passion fruit mousse
1
Hydrate the gelatin with water
2
<p>Put the concentrated passion fruit juice and the passion fruit pulp in the blender and beat for 1-2 minutes</p>
3
Then add the condensed milk and cream and beat for only 20 seconds
4
Put the gelatin in the microwave for 20 seconds and add it to the blender
5
Beat for another 20 seconds
Topping
1
Put all the ingredients in a pan off the heat and stir
2
Take to low heat always stirring
3
When it boils, cook for 1-2 minutes
Assembly
1
<p>Take the form that baked the cake and line it with a plastic bag suitable for food</p>
2
Put a layer of dough at the bottom, it is important that it is the smoothest
3
Drizzle with syrup
4
Put half of the filling
5
Put another slice of dough
6
Drizzle with more syrup
7
Add more filling and leave a little in the blender
8
Put the last layer of dough
9
Drizzle with the rest of the syrup
10
Spread a very thin layer of what was left of the filling
11
Cover and take to the refrigerator for at least 3 hours
12
Unmold the cake by pulling the plastic bag
13
<p>Spread the topping while still warm</p>
14
Wait for it to cool to cut the slices
Packaging
1
<p>I used cellophane paper (it comes in the size of 33.46inx39.37in or 85cmx100cm) I cut it to the size of 11.02inx9.84in (28cmx25cm)</p>
2
Take a spatula and fold the cellophane paper, this will make it much easier
3
<p>Cut the cake about 0.79 in (2 cm) and place it on the cellophane paper</p>
4
<p>It is very important to always wash the knife with each cut</p>
5
<p>Fold the cellophane paper over the cake and run your fingers gently so that it sticks</p>
6
<p>Close with a tape. Close the little ends like a gift and also put tape.</p>
Observações e Fotos
Valid to: 3 days, stored under refrigeration (in the refrigerator) and 30 days, stored under freezing (in the freezer);
For the cake slice packaging, there is also a slightly plasticized cardboard sheet to put this type of cake that makes it even more protected, as well as boxes, look in confectionery stores or on the internet.